 |
 |
 |
 |
 |
 |
|
Making the PCB (Part 3)We've seen how to get a toner image onto a shaped, copper clad board. Now we're going to etch. Before we do, we need to look at touching up. We need to touch up because there may be minor imperfections in the toner image. We previously looked at removing the stray board edges. We can also add material to include features at this last stage before etch. You won't always need this but I'll mention it here anyhow. We can use two techniques for touch up. The first is a general touch up. It doesn't change what's there, merely ensures that what is in the toner image actually ends up on the board in terms of traces. The toner it's self is a little porous. Once can't always see the pinholes, but rest assured they're there. Film touch-upThese pinholes can be filled with typist's carbon transfer film. It's a quick easy process which you should always complete. Cut a sheet of the film big enough to completely cover the board on the copper face. Allow a small margin around the edges. Wrap the film round the board, and pass it through the hot laminator, perhaps five times. 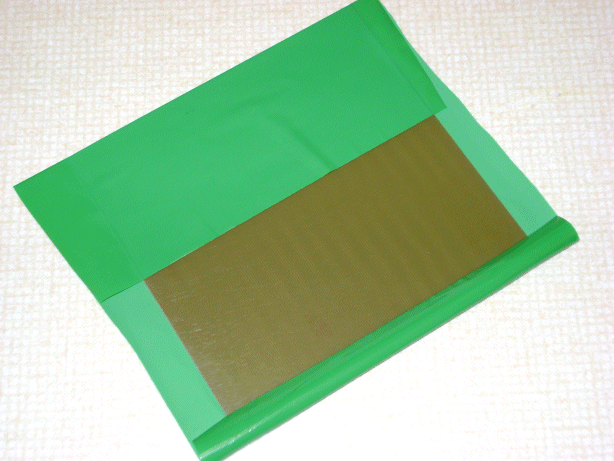
You should find that the film has stuck to the board, but if you peel it back, it has only stuck to the toner image. The powder on the film has been sucked up by the toner. The pinholes are filled. 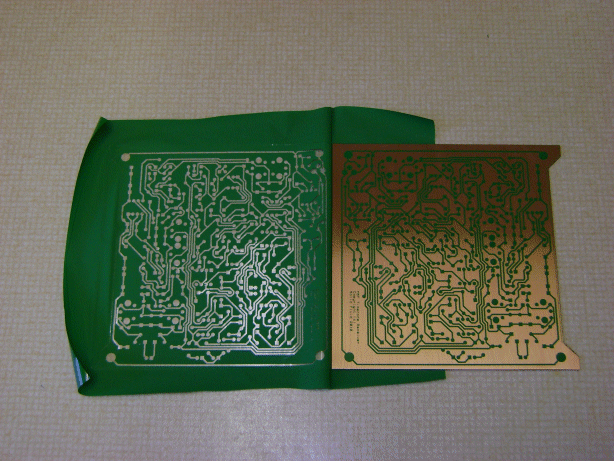
Pen touch-upNow go around the board with a magnifier, or your eye, and look for any spots or holes in the image. You can try another layer of the film, but it is possible that you will get stubborn areas that remain. If this happens, simply use a permanent marker to touch them in. I use a fine tip marker of the sort you use to write on blank CD's and DVD's. Just run around until you've covered them all. Although it is possible to draw in additional tracks using this type of pen, or even a more specialist purpose made marker, I'd not bother. Even though we're using a really coarse design rule, it's exceptionally hard to match even this level of precision in the artwork. If it's not right now - go back to the cleaning stage and use a new artwork. After all, the whole point of this process is that we're not using old fashioned Letraset!! EtchingAt this point we're ready to do the actual etch. It's pretty straightforward. You'll need a small bottle of Ferric Chloride - Iron (III) Chloride, a shallow plastic tray, and a few small pieces of sponge. Wear gloves, household Marigolds are fine. They use them in the nuclear industry!! Have a large bucket of water on hand, mainly for rinsing the gloves before you take them off. Perhaps wear goggles; I usually use my machinist's safety specs. Goggles probably would be better for this, but the Ferric Chloride, isn't that harmful. You certainly wouldn't want to drink it, but if you get it on your skin, it's not the end of the world. Just use your bucket of clean water to rinse, and follow up with a more thorough wash as soon as you can. The real problem with Ferric Chloride is that it stains a horrible yellow colour, and it smells bad. If you like your clothes, wear a boiler suit or a lab coat. To get the best possible etch times, and use the smallest quantity of acid, the best way is to put the acid into the sponge and scrub. It'll be clear pretty soon that fresh acid is the quickest, but that route is very wasteful. With scrubbing you can complete a small etch like this in around ten minutes. That's quicker than a full on spray etch tank, with gallons of acid and copper wastes. Eventually the whole sponge will turn black, and when this happens, it's time to use a new one. Small sponges are better. For a given volume of sponge, small sponges have more sides. When one side goes black, you can use another. These sponges are about 2" x 1" square, for this 4" squared board I used just four sponges, and perhaps one and a half capfuls of the acid. That's about thee cubic centimetres. 
As the board comes close to the complete etch, a clear patch will appear, and you'll know you're nearly done. Keep going, until the clear patch covers the whole board, and then just go for another minute, until there are no tiny shiny edges around the resist. Place the board in the water bucket, and inspect your work. When cleaning up, if you must tip the waste water away, it's better to put it down the sink or toilet, than it is to put it in an outside drain. Outside drainage invariably enters a water course untreated, at some point. It's not terrible, but it's not really very nice. When you think about all the metallic wastes that come from cars, wash over the road in the rain, and drain onto the land. It puts all this into perspective. Nevertheless, the sewage wastes are very well treated, in most advanced countries. You've used a tiny quantity of the acid, and there wasn't much copper involved. It's the etched copper that's the real evil like the metallic wastes from the cars, not the acid. Always flush with plenty of water. Litres and litres; use a hosepipe at the toilet if you can. Use plenty of buckets otherwise. The aim is to dilute as you dispose, as well as before and afterwards. If your waste water goes to a septic tank, or you live in a remote area with limited treatment, forget the sink and toilet. The chemicals will upset the bacterial action of the septic tank or the natural cess. In this case, or as an alternative to dilution, use kitchen or toilet paper to absorb the chemicals. Put the waste paper and used sponges into Ziploc bags. Seal the whole thing in multiple carrier bags taped up. Send the whole affair to landfill, or use specialist disposal. 
The picture above shows the sort of thing you should end up with. It's now really clear just how resilient the toner is. All that rubbing, and it's still stuck firm. In this image you can more clearly see the places I touched up with a marker pen. On the next page, we'll clean up the board, plate it, and drill the holes. We're nearly there. |


Copyright © Solid Fluid 2007-2025 |
Last modified: SolFlu Sat, 03 Jul 2010 00:18:39 GMT |